Sunday, April 10, 2016

Create Your Own . . . Clip Art

Copyright issues sometimes plague genealogists and the family historian. This is especially true if we plan to publish our stories and research findings. Who owns the copyright for an image? When does an image belong in the public domain? Just because you own a photograph of your ancestor, does that mean you own the copyright to that image? The purpose of this post is not to address those issues. Instead, I refer you to Judy Russell's blog, The Legal Genealogist. She's the expert in topics relating to copyright and genealogy.

Instead, I want to provide some ideas for creating your own images for which you will own the copyright. Since most of us carry a smartphone all of the time, or have some kind of a point-and-shoot digital camera, creating your own images becomes pretty simple. You have to think Image. Think Graphic. Think Composition.

In college, I studied both photojournalism and art photography and have been an amateur photographer ever since. When I lived at home, my Dad even built me my own darkroom in our basement. I don't miss the smell of those chemicals contained in a small space and I'm so glad we have moved into a digital world. But ever since I was a youngster, I've seen my world inside of framed images. I'm always thinking, "how I can best compose a photograph of this subject?" Most of the time, I have a digital camera with me, but I ALWAYS have my iPhone to capture those spur of the moment shots.

I enjoy traveling, sightseeing, visiting museums and historical landmarks. Not only do I try to capture the typical "tourist" photos, I also have an eye toward what will make an interesting photograph to enhance a blog post, article or other published piece I might write about my ancestors. Over the years, I've created a fairly extensive library of photographs that I can enhance through photo editing software or apps. I can use them freely because I own the copyright since I took the photographs.

Everywhere you go, always think "Clip Art Library" and before long, you will have your own source of images for blog posts, articles, and family history books. Once you begin accumulating your images, you will need to organize them within folders on your computer and perhaps tag them with subject matter such as pioneers, flags, prairie, homestead, etc.

The following are a few of the images that I've captured in recent years. I hope they will inspire you to begin your own clip art library of images for which you own the rights and can use freely.

This one isn't all that exciting, but we are always writing
about libraries, archives and research.
So add a few shots that you've taken while visiting a library.
This is the cabin on the grounds of Homestead National Monument.
I've used variations of this which I've created in photo apps to make it look like a sketch,
a pencil drawing or a sepia print. I've used this one a lot!

Here's an example of a pretty boring photograph of one of the displays at the Leonardo DaVinci
exhibit that I shot at Union Station in Kansas City last month.
See the next photo for an example of how to make your photos go from ordinary to extraordinary.
This photo is composed with much more interest, focusing on the work table.
Same space, different perspective.

What might have been in the covered wagons our ancestors drove
as they moved westward in the 1860s? Here's an example I discovered at
the Pony Express Museum in St. Joseph, Missouri.

I haven't used this image yet, but can't we always use a reference to a compass?
Photo taken at the Lewis and Clark Center near Nebraska City, Nebraska.


I've used this image when writing about my Irish immigrant ancestors.
Photo taken at the Kansas City Irish Center when it was located at Union Station.

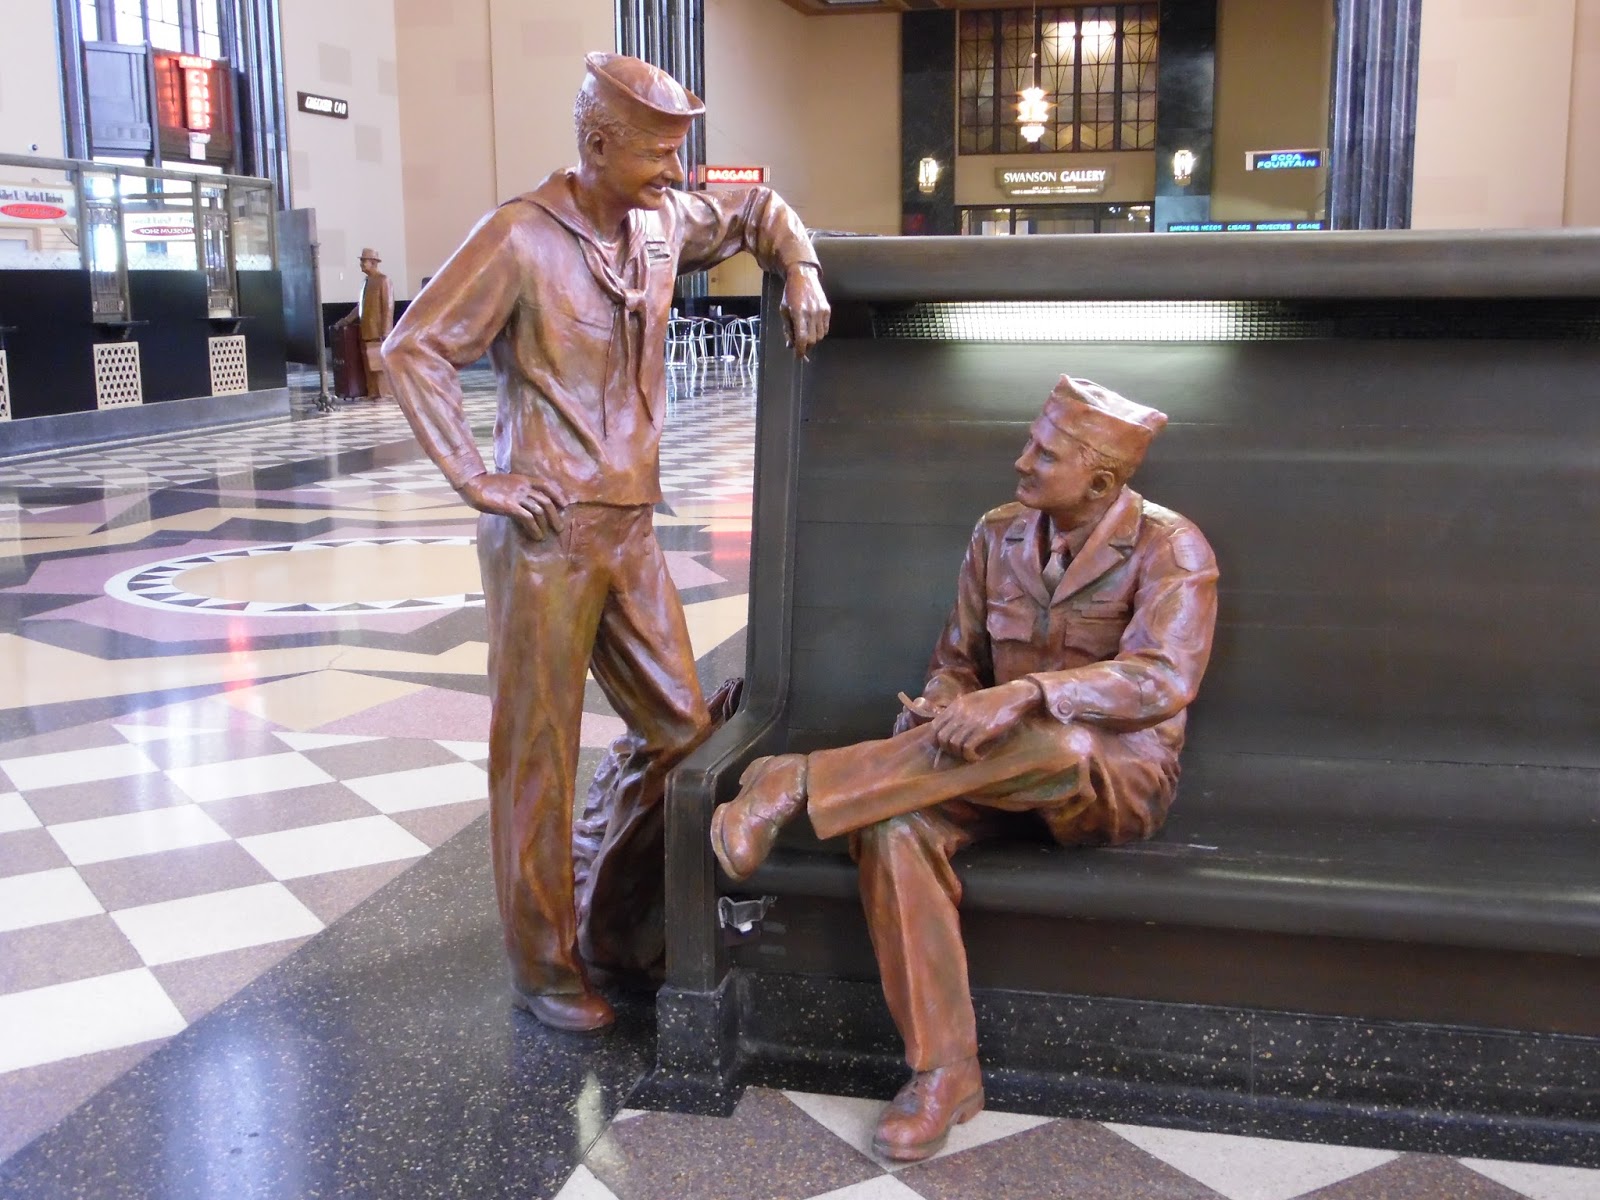
I took this photo yesterday at the Durham Museum in Omaha.
It was formerly the Omaha Union Station.
Sometime when I'm writing about my family members who served
in World War II, this is an image I can use.

Here's another example of a not very interesting straight-on shot.
See below for better composition.

This view is more interesting and I can use the
space on the right to add some typography, a quote or meme.

Example of a One Room School - establishing shot.
Durham Museum - Omaha

Then go for the special interest shot.
Durham Museum - Omaha

Wyuka Cemetery - Lincoln, Nebraska
This is one of my favorite views at Wyuka.
And here's how I turned that image into a sketch using an iPhone app.


My Mother's Hand
This is a recently discovered photo that I took of my Mom's hand with a family
Bible and some ancestor's glasses (no idea who!).
This was among a huge collection of negatives of photos I took while in college.
What a treasure for me to find this one!

With some simple apps, you can convert old images into interesting graphics.

Having fun with ancestor photos.
With photo apps, you can create collages and memes.

This is an old photo scanned from a negative.
It could still use some enhancing in Photoshop Elements.
Arthur Cemetery, Arthur, Nebraska.

Boot Hill Cemetery, Ogallala, Nebraska
I thought this view was much more interesting
than shooting from the other direction.
I've actually reversed it for a project so that it doesn't read backwards.
I'm a flag geek. I always take photos of flags flying at the sites I visit.
This is at the Museum of Danish America in Elk Horn, Iowa.
These are just a few examples of keeping your eyes open for Photo Ops. With digital photography, we are no longer restricted to 36 images per roll of film. Shoot photos to your heart's content. Even now, with no restrictions, I still feel as though I never take enough photos! Although, my Facebook friends and followers on Instagram may argue with me on that!

Here's a few more tips:
  • Take an establishing shot. Get the big picture. This is especially true when photographing cemeteries. Don't just take the photo of your ancestor's headstone. Get a wider view of the entire plot and area.
  • Take a photo of identification information. If it's a museum or gallery, take a photo of the sign that shows the hours of operation. Always take pictures of the historical marker that describes the site you are visiting. You may not end up using these in your project, but it's a good point of reference.
  • Take shots from several angles. Get your establishing shot, then shoot from the right, shoot from the left, zoom in. Look for interesting patterns, shadows and light. With digital, you can afford to take as many photos as you want.
  • Experiment with portrait and landscape and square. Use what suits your purpose. Since becoming hooked on Instagram, I shoot a lot of square photos (even though Instagram now allows other formats). You're not going to be shooting the inside dome of a state capitol building using landscape! If you are photographing art or exhibits in a museum, get a photo of the sidebar description of the piece. Again, that is for your reference, not necessarily something you will publish. It's akin to "citing your sources."
  • Start thinking in pictures, images, graphics. Think how you might be able to use a photograph of what you are seeing.
  • Look up. Look down. Perspective gives you a variety of images. A few months ago, I posted a collection of photographs I had taken of my hometown in the 1970s (I'd been binge scanning old negatives). A friend who is an art major/photographer commented that he had never seen our city in quite the way I had captured it. It's because I was looking up and looking down.
  • It is not possible to take too many photos!
  • Make sure you organize your collection. As mentioned earlier, add metadata to your image file that has tags so you can easily find what you're looking for.
  • Flags are always good subjects. Or maybe it's just me. I always tend to take photos of flags flying over whatever site I'm visiting.
Some IOS (iPhone/iPad) apps I enjoy using to enhance my photos include:
There are thousands to choose from! Keeping playing and experimenting and you can convert your photos into a variety of creative graphics.

Saturday, January 30, 2016

A Danish Day in Elk Horn, Iowa

I have a relatively (ahem!) long list of genealogy road trips on my wish list. Many of them are one-day trips and yesterday I was able to visit the Museum of Danish America in Elk Horn, Iowa. If you have even an ounce of Danish blood in you, this is a museum and community you must visit as part of your genealogy journey. Elk Horn is a community of 662 people as of the 2010 census. It's about a two hour drive from my home in Lincoln, Nebraska, so I have been waiting for a warmer and sunny day to make the trip. My genealogy pal, Judy Shutts of Voices in Time, is always eager for a road trip and we were both ready for a getaway.

We left Lincoln about 8 a.m., which seems to come way too early since I've been retired. This month marks the third anniversary of my retirement from public service with the state of Nebraska. Wow, how time flies! That put us into Elk Horn about 10 a.m. and our first stop was the Museum of Danish America.

The Museum of Danish America
With the cold Iowa wind blowing, it was a bit chilly, so we quickly got some exterior photos of the museum as we left.

I'm looking forward to a return visit during warmer weather so I can see the 30 acres of prairie surrounding the museum in the Jens Jensen Prairie Landscape Park. I'm sure it will be an amazing experience, as compared with the windy 40 degree temperatures we experienced yesterday!


I really didn't have a huge expectation of what information I might discover about my Danish heritage. Mostly, I wanted to learn more about what motivated my people to immigrate to America. My Danes are the only line of my heritage that I've been able to track "across the pond" - mainly due to the exceptional census records available on the Danish Demographic Database. Because of these records, I've gone back to my fourth great grandfather, Povel Madsen, in the 1700s.

The flags of Denmark and The United States
of America fly proudly outside the museum.
It was pretty exciting a few years ago when I found my ancestors on a passenger list on Ancestry.com. One must always think outside the box when doing genealogy. My family came to the U.S. via Canada with the intent of settling in Waterloo, Black Hawk county, Iowa. Based on what I know about migration patterns, I still assume that there must have been someone they knew who had already come to Waterloo - or some reason that they knew that was where they were headed. I didn't get the answers on this research trip, but it continues to be one of the questions I'm pursuing in tracking my family from Denmark to the United States.

The Museum of Danish America is a wonderful museum dedicated to the Danish in America. The exhibits are well curated and provide a lot of history about the Danish in America. I often have the tendency to rush through the museums I visit, but I took my time in reading the explanations about immigration - I really wanted to learn more about why my ancestors came to the U.S. when they did.

Choosing a New Land
These explanations at the museum provided some background on what motivated the Danish to come to America.

The lower level of the museum includes a glass enclosed case of many family heritage artifacts, including the iconic blue plates (we had a few of these in the family at one time), knick knacks, musical instruments, china and household items, items specific to the Danish Brotherhood of America. There was no public access to view the items in the collection close-up. I imagine that it might be possible to observe these under the supervision of museum staff. I didn't ask.


The "cocoa set" that belonged to
my great grandmother Caroline Petersen
Among the heirlooms passed down to me is what my Dad referred to as a "cocoa set" which may also be called a "chocolate pot." It includes a tall pitcher, a bowl, four cups and four saucers. I currently display this set in my "family heritage center" in my home.

Judy and me at the museum
Here's a composite photo I made for Instagram of Judy and me at the museum and the signs at the genealogy center which is on Main Street, a couple blocks from the museum.

After our visit to the museum, we had lunch at Larsen's Pub. I only had to see that one could have a burger with Havarti cheese to know what I wanted for lunch! That's been one of my favorite cheeses for a long time, and knowing it originated in Denmark made it even more special.

After finishing lunch, Judy asked the proprietor where the genealogy center was located. This was a pretty good question in a small community. Immediately, he replied, "Right next door!" Wow. We didn't even have to move the car!

An afternoon of research

As mentioned earlier, I didn't have a lot of expectations of what I might find at the genealogy library. I had taken along some printouts of family group sheets with the information I have collected on this line of my family history. As an afterthought, I tossed my Kindle Fire in my bag, with the Ancestry app. Several times I had to refer to my family tree to get specific information on names and dates.

The ladies in the library were extremely helpful. As I read through books on Cedar Falls, Iowa and Black Hawk county, I found some information about what attracted the Danes to this part of America. It was the kind of information I had been looking for. After a while, the ladies showed me the original documents from Denmark they had discovered about my family! Not only had they found birth, baptism and marriage records, but also photographs of the churches where the baptisms and marriages had occurred. Part of the service they offer to researchers is to transcribe the Danish records into English. I really felt I had hit the mother lode of family history research! To say that I did the "Genealogy Happy Dance" is an understatement!

These are the original documents (in Danish) that the staff printed
and translated for me, as well as photographs of the churches
where the baptisms and marriages occurred.
I found this death record information about my 2nd great grandfather,
Peder Jeremiasen, in a book published by the Iowa Genealogical Society.
I didn't want to be on the road too long after day turned in to night, so we left the library about 4 pm. We still wanted to visit the Danish Windmill, so we stopped there on our way out of town.

The Danish Windmill


Danmark Sweatshirt and
some Carlsberg Elephant Beer

I've been wanting to get a red sweatshirt (without Go Big Red on it), and I found this at the Danish Windmill. I've never had Danish beer before, so I bought a six pack of Carlsberg Elephant Beer. The taste is quite similar to Corona. You've got to have Danish beer at least once in your lifetime!

What can I say? It is SO COOL to go somewhere where they know that your surname is spelled with "sen" rather than "son." !!! Rock On!

Kudos to Michele at the Museum of Danish America library for her exceptional help and the translations, and teaching me how to pronounce Jeremiasen properly! And to the other ladies who helped with my research yesterday. Yes, I will definitely be back! And today, I submitted my payment for membership to support the museum. Yesterday's Genealogy Road Trip far exceeded my expectations!

Michele asked to photocopy my Family Group Sheets so they could begin a file on "my people." It was a no brainer for me to oblige. I plan to compile a binder of the information I've gathered so far, with printouts and copies of documents. I want to leave behind some bread crumbs on my family line for future researchers.

I always thought that my Danish line would be the most difficult to track because of the patronymic naming system - changing surnames with each generation. Who knew that it was going to be the easiest and the first of my ancestral lines I would find "across the pond"?